If you are a woodworking enthusiast, you cannot get enough of all the power tools available in the market right now. Of course, you cannot have them all at your workshop, and to be fair, a lot of the tools are trade to seem helpful, but in reality, they are not. Luckily for you, we have done some extensive research and narrowed down ten of those tools that are a must-have and will cover all your woodworking needs. Remember that woodworking is an art, and you do not need to be a carpenter to own these tools, nor will you be dubbed a carpenter if you own any of them.
Before we dive into the topic, just a friendly reminder, safety should always be your number one priority. I always read the instruction manual which comes with the package before using any tools, even though I will be explaining how to use them. Each brand creates its unique products and has its original instruction manuals. Most features of a type of tool will be similar for each brand, but that does not mean you can safely operate them all. A few standard safety procedures would always be to use eye goggles and noise protectors for your ears as it can get loud sometimes. Prolonged inhalation of dust particles is terrible for your lungs, so consider using a mask as well. If you have long hair, make sure you tie them back while handling the tools. As you all already know, it is better to be safe than sorry.
Essential Carpentry / Woodworking Tools list (Power Tools & Hand Tools)
Circular Saw | Carving Chisels & Gouges | Coping Saw | Sliding T Bevel | Routing Tools |
|---|---|---|---|---|
Marking Gauge | Utility Knives | Table Saws | Jigsaws | Combination Square |
Sharpening | Router Plane | Claw Hammer | Random Orbital Sander | Marking Knife |
Mallet | Planers | Screwdrivers | Backsaw | Drills |
Smoothing Plane | Hand Saws | Scratch awl | Clamp | AXES & HATCHETS |
Now if we have that cleared out, we can begin. Here are the ten power tools every Woodworker/Carpentry should own:
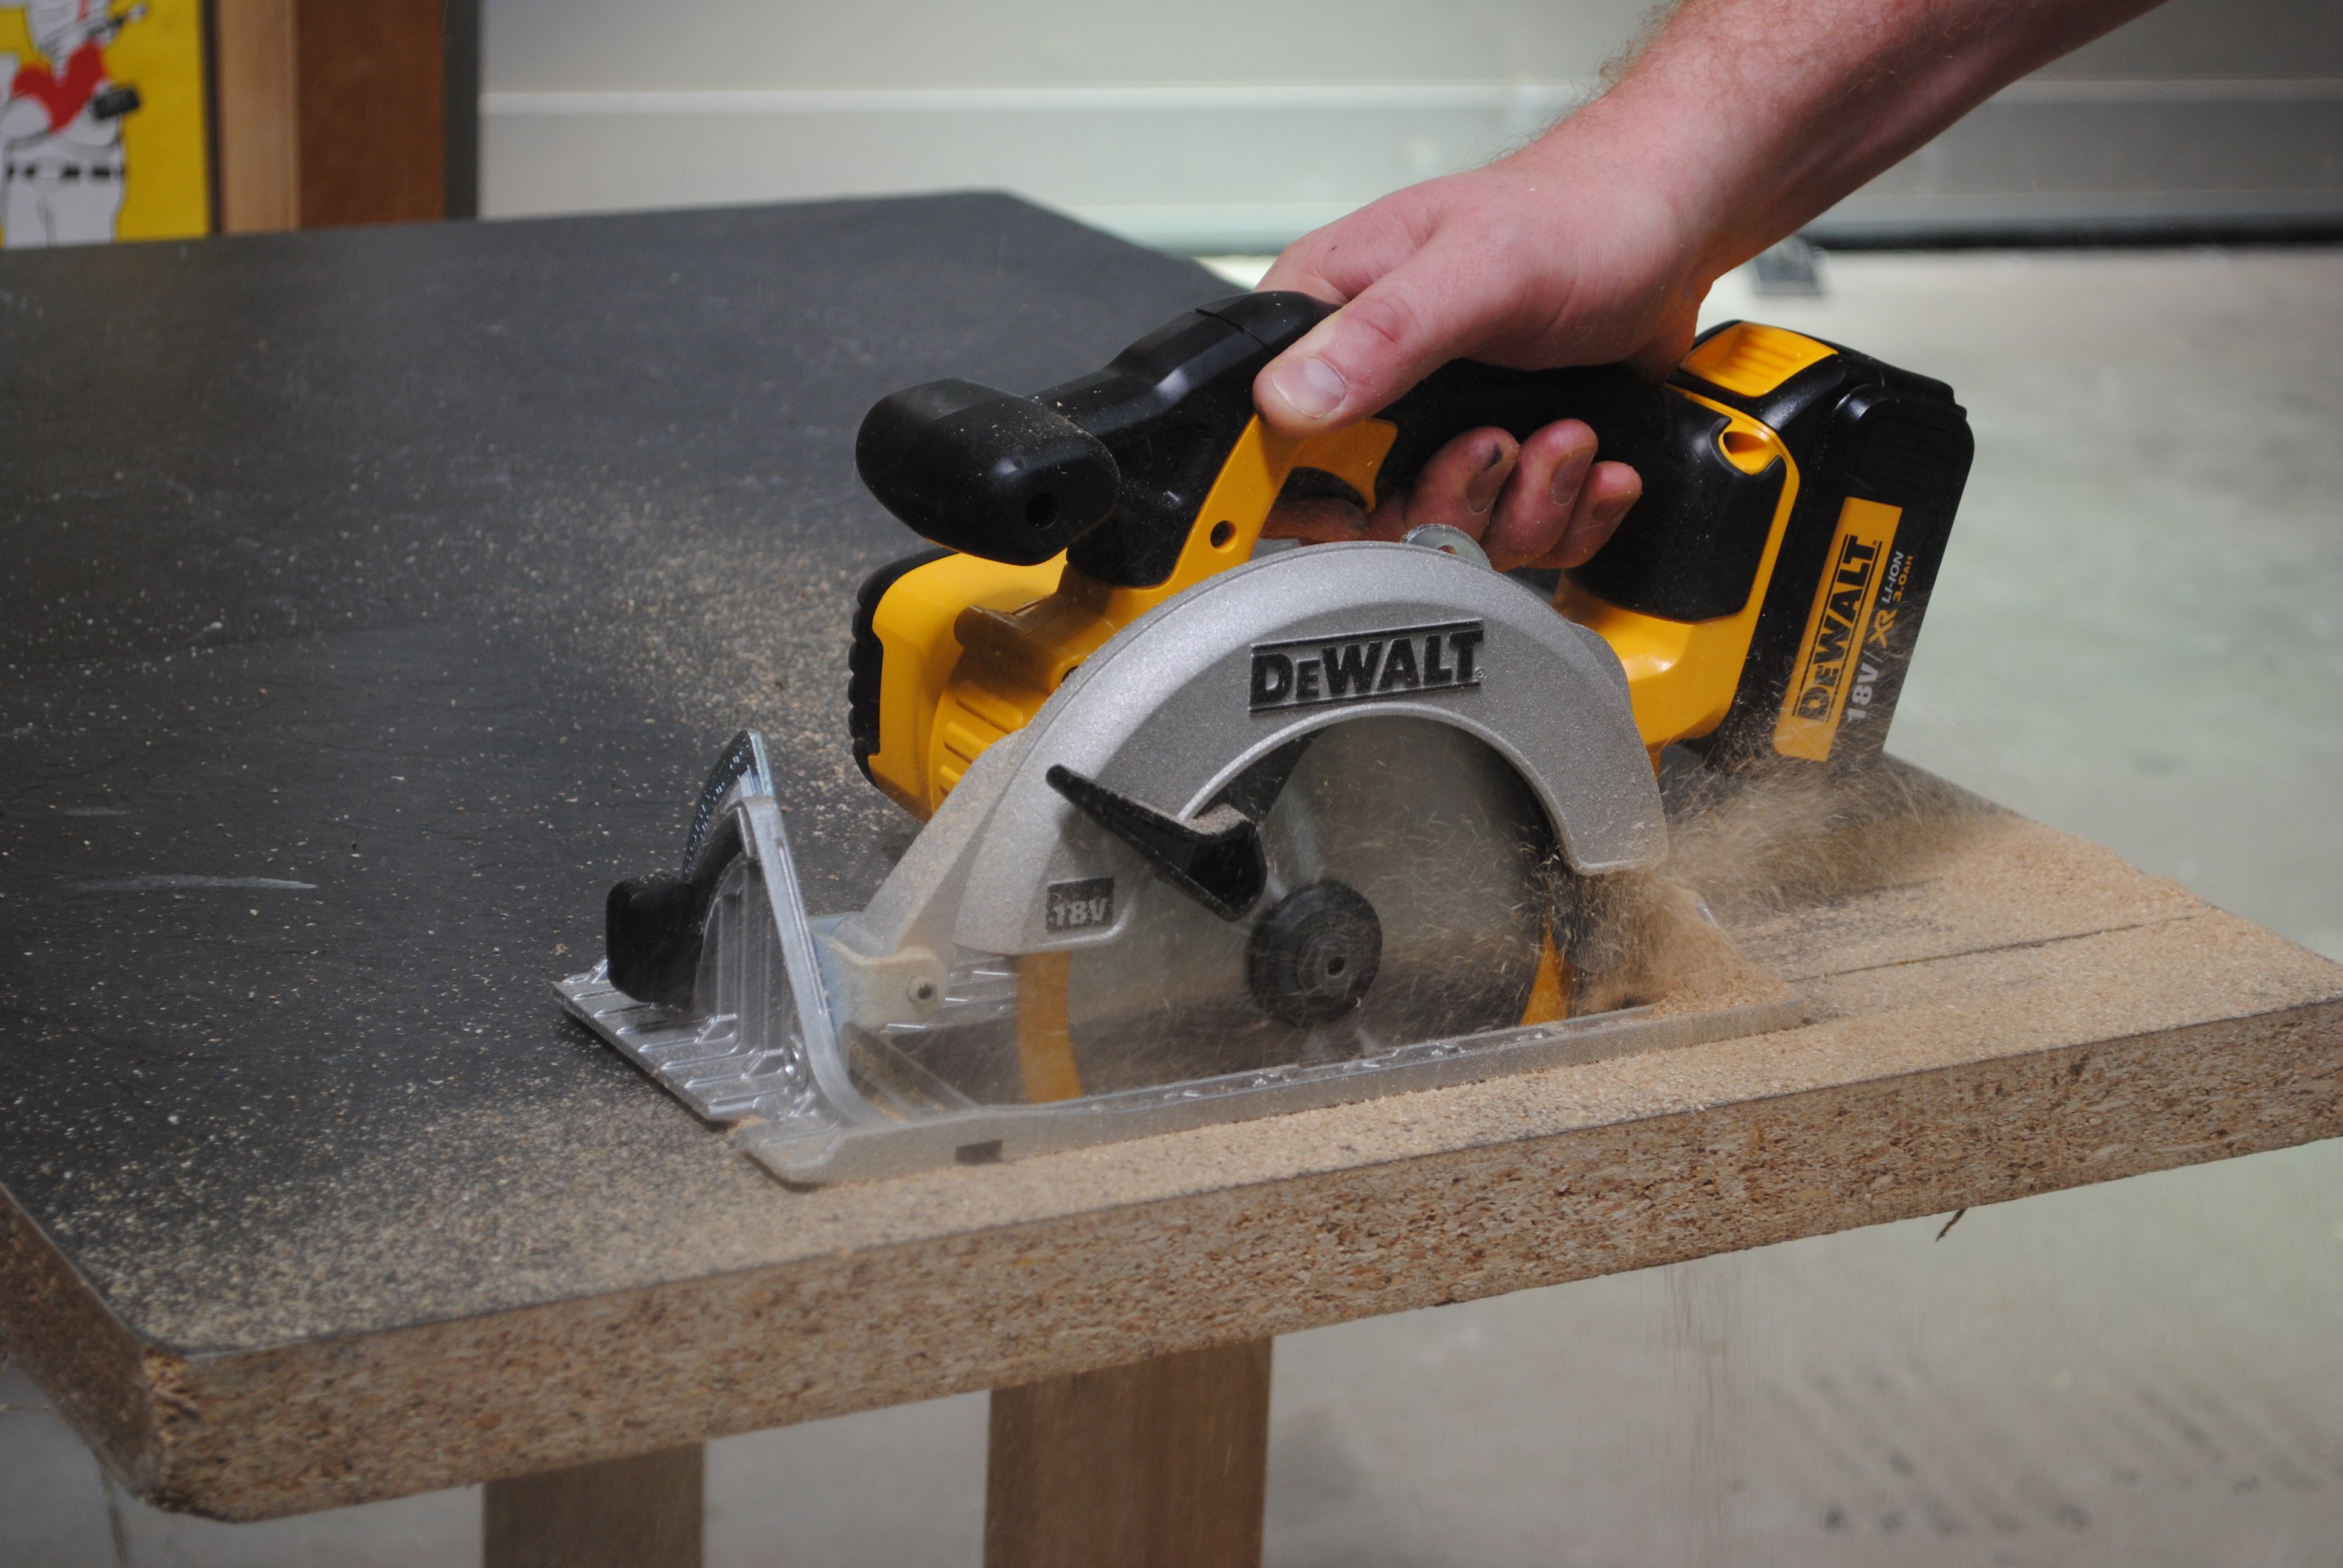
1. Circular Saw
A circular saw is a powerful tool that uses a circular blade with teeth to cut plastic, rubber, glass, metal, and anything of that sort. It uses a rotary motion, where the blade spins, and the friction cause objects to cut in half. It is usually run through electricity but can also run by gasoline.
There are different types of circular saw with varying kinds of motor. Currently, electric motor, gasoline engine, and hydraulic motor are available for circular saws. It can be operated handheld or mounted on a table. Although nowadays, the handheld versions are called circular saws, and the mounted versions are called chart saw or chop saws. However, do not be misguided; circular and table saw quite a lot in function and operation.
Circular saw was first used in lumber mills in the 18th century. It was known as the ripsaw, and it converted logs into lumber. It made its appearance in the United States in the mid-19th century.
As electricity was not yet available then, a watermill was usually used to operate the saw. Before circular saws, logs cut using a pit saw. It required tremendous effort and labor to slash a single wood into lumber. Although a circular saw requires more power to cut a single timber, circular saws do not require human work and cut faster. For the sound it creates while operating, it has earned the name of a buzz-saw. There are many claims as to who invented the circular saw.
Pros:
- For its portability circular saws can be used almost anywhere,
- Can be used to perform nearly all sorts of cuts,
- Very safe to use.
The only thing you require is a bit of patience to set up the saw properly before carrying out the cut. If you can display that patience, this tool alone will meet a significant portion of your woodworking needs.
Usually, a circular saw has two handles. The rear handle has the safety switch and the trigger switch. The front handle is meant to add stability while cutting and also allow you to guide the blade to make curved cuts. The bottom part is known as the show or the baseplate that lets you set the tool on a solid surface while cutting. It also allows you to set the depth and angle of your cut.
A blade guard is surrounding the blade that will stop the blade from potentially harming you and protect the blade when you leave it lying around. Thanks to the smooth hinge the blade guard will automatically open while making a cut and you don't have to remove it manually.
Make sure the depth of the blade in just a bit more than the thickness of the wood, because it is not only dangerous to have the blade sticking out too far, it makes the cut harder as well. To make straight cuts, use to solid straight material (preferably a straight beam) to press the baseplate against so that the blade can be moved in a straight line. You can also use an accessory known as the speed square to hold the baseplate in a straight line. Given enough time and practice, it will get easier to operate the circular blade and deliver smoother cuts.
There are several types of blades available for a circular blade that differ in teeth number. More teeth deliver a cleaner finish but are harder to execute longer cuts with them. Fewer teeth make it easier to make longer cuts but leave a crude finishing. Remember, you can always use a sanding paper to remove peaks and troughs to deliver a smoother finish. So, use specific blades to make particular cuts and use a sander for the finishing.
Safety
For safety while using a circular saw use eye goggles, noise protectors, and a dust mask. A pair of glasses will make sure no splinter of wood come flying into your eyes. All power tools are loud and not suitable for your ears, so a pair of noise-canceling headphones is necessary. Fine dust particles can accumulate in your lungs and cause breathing problems, so use masks. You are safe from the blade as the blade guard does an excellent job covering the blade and only exposing the part of the blade that will cut.
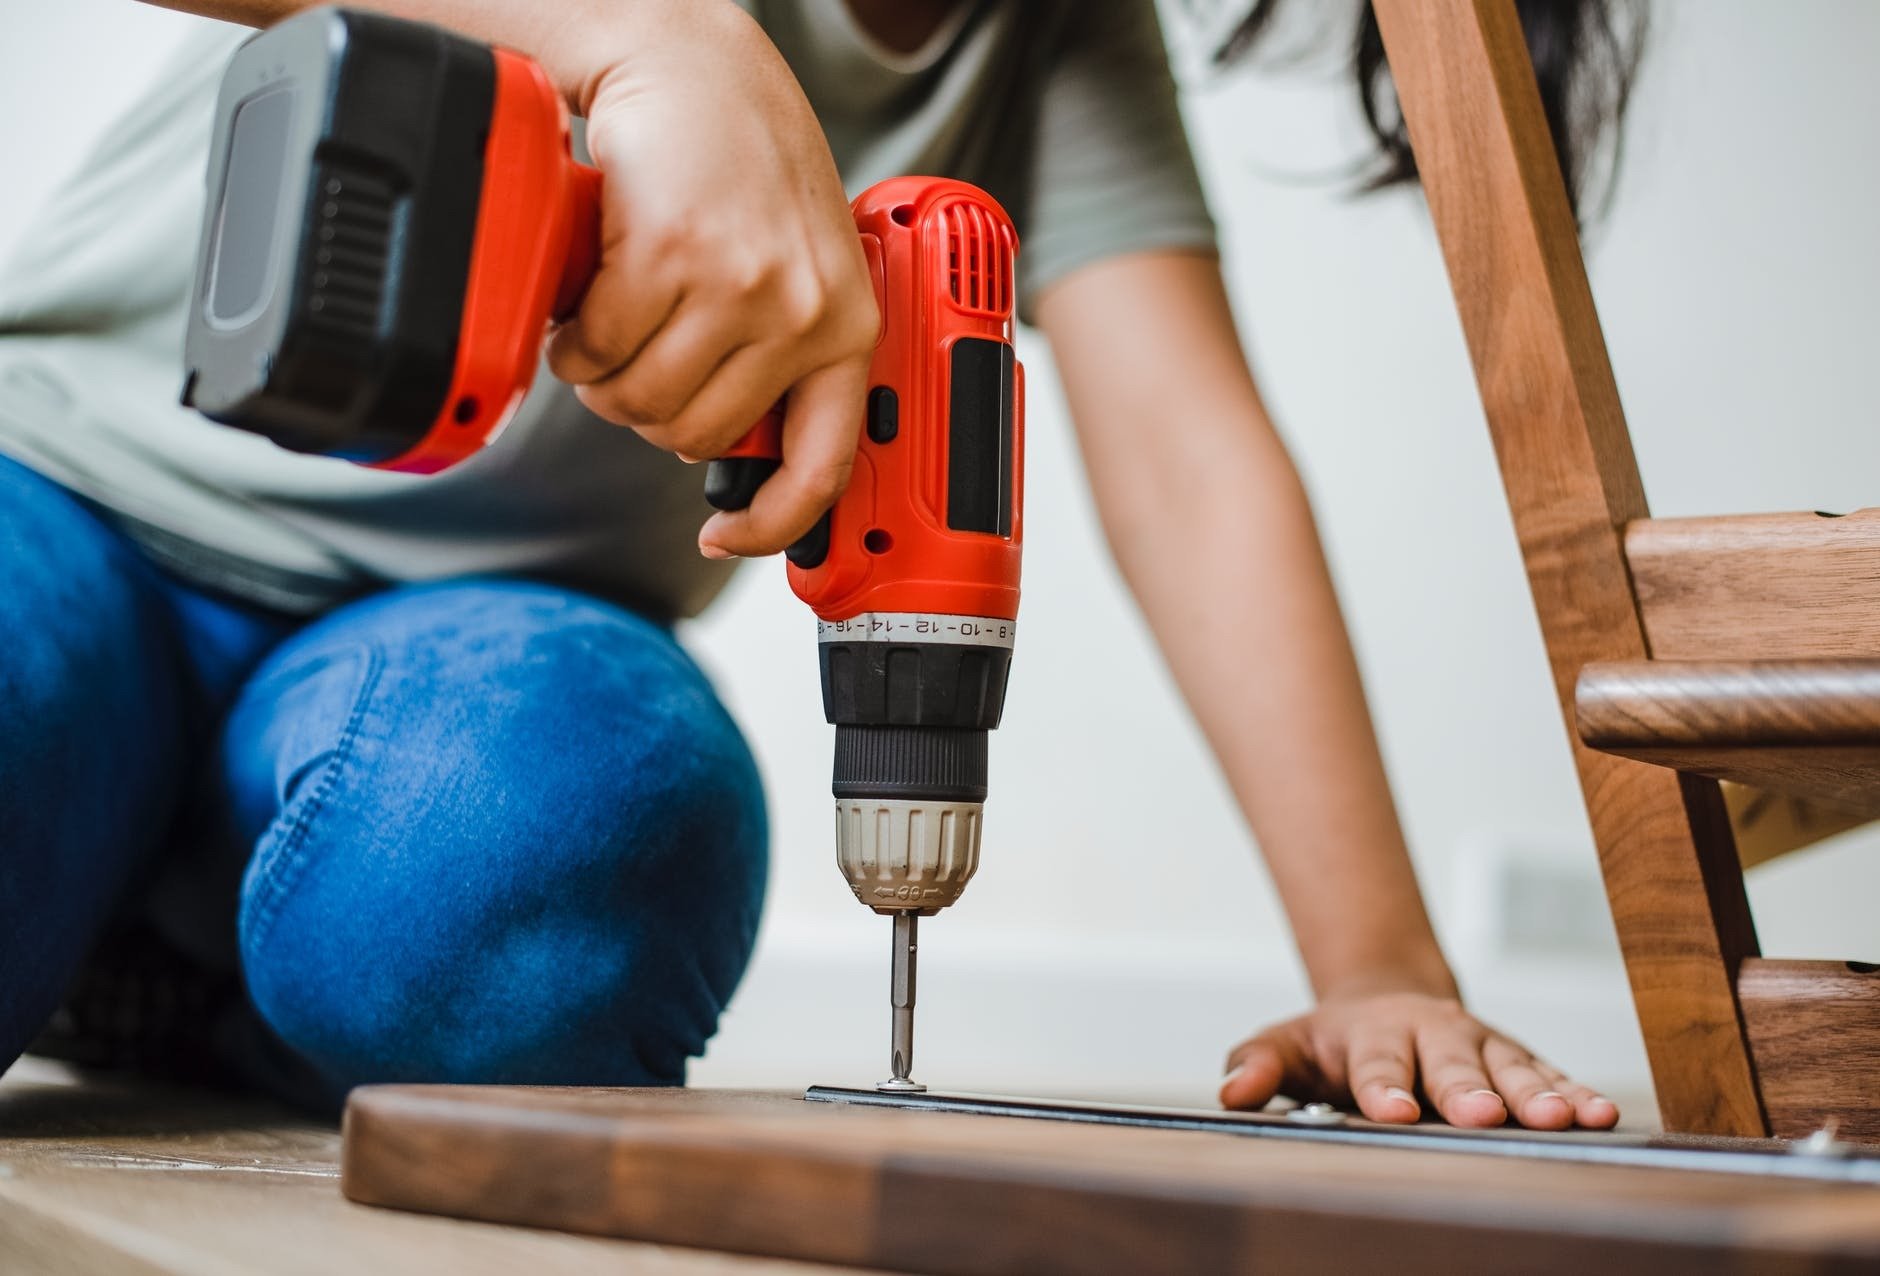
2. Power Drill
A drill is a tool that is used for either making circular holes or for tightening circular nuts. If the body is fitted with a drill head, it can be used to drill holes. If the body is equipped with a driver's head, it can fasten nuts. In recent days, a hummer function is available as well. Drills are used for woodworking, metalworking, machine making, and every other work where you need to drill holes.
Power drills are one of the most common tools that you will find in workshops. They are available in different power, size, and speed. It is available in two versions — the corded version, where the body must be connected to a socket with a wire. And a cordless version, which is run using a battery. The cordless version is gaining popularity while the corded version is slowly losing customer base.
The bow drill is the first working drill found by historians that used a rotary motion to drill holes. It was mainly used to make fire, later also for creating art and painting on woods and stones as well. The drill had many functions in society from ancient times. After the bow drill came pump drill then the core drill. In the east, the churn drill was invented as well.
Eventually, with the advancement of electricity and sophisticated machines, the power drill came in the spotlight. Over the last hundred years, a lot of version of the power drill came which differed in size, speed, and power. There are multiple sources of power for the power drill as well. Majority of the drills uses electricity, some uses compressed air as well, and a very few uses gasoline for their combustion engine.
The most common is, of course, the corded version which uses electricity from the mains to operate. A pistol grip runs it, and the trigger switches the drill on. Usually, the drill is run by a universal motor and rarely contains motors of other kinds. Nowadays, a lot of attachments are available that can convert the drill into a variety of other useful tools. Such as a powered hammer, power saw, orbital sander, and much more. Buying these attachments are a lot cheaper than buying individuals tools for these functions. Also, thanks to the slim and light body, the power drill can reach most tight spots other tools cannot.
Pros:
- The cordless version can be used almost anywhere, even in tight spots,
- Can drill almost any types of holes,
- Lots of accessories available.
Increasing in popularity, the cordless drill does all the things a corded drill can do. However, the battery is the most expensive part of the cordless power drill than any of the attachments. So, make sure you take care of that battery and do not leave the cell to dry up. Also, the battery causes the cordless version to be a lot heavier than the corded version and causes it to be a bit less versatile. But thanks to the power being supplied by the battery, you can use it anywhere.
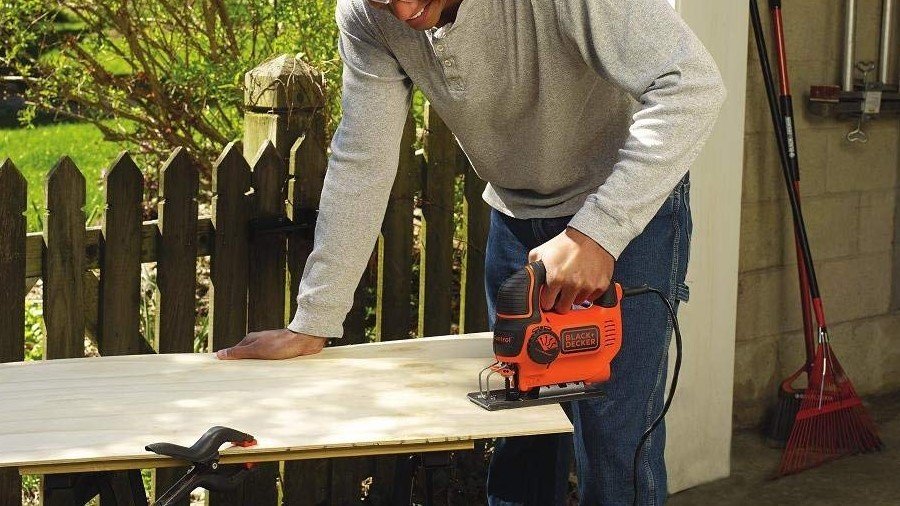
3. Jigsaw
Jigsaws uses a reciprocating blade that moves up and down; using this motion it can be used to cut metal, wood, plastic, and other materials. The reciprocating action is so fast that the blade is seen to be vibrating. The speed can be controlled to suit the user's needs. Today, the power jigsaws which are run using electricity are known as scroll saws. Scroll saws and power jigsaws are broadly similar tools, with a tiny bit of difference in the ways they function. They are available in prices ranging from $100 to $2000
Jigsaws first appeared in the 19th century, and the modern portable version made its appearance in the 20th century.
The scroll saw or power jigsaw can be used for rough works, such as cutting wood into pieces, as well as for delicate works, such as decorating ornaments and curving woods to be served as showpieces. Although the power jigsaw is not a must-have tool for every woodworker, it is, however, a must-have tool for people working in the field of design. An essential tool is used for designing and decorating woodworks.
Both of these tools allow space for a lot of creativity. Thanks to its light and slim body, it requires very little space to function. It can carry out all the function needed for woodworking except for drilling holes. Its primary use is to cut curves on wood, which it can do with high accuracy and precision. Of course, the skill of the user matters as well. A variety of blades are available for the power jigsaw, ranging from simple toothed ones to diamond coated blades as well. The diamond coated blades can be used to cut glass, a feat which very few household tools can perform. In addition, blades of different weights and sizes are available and can be found in almost all hardware stores.
Pros:
- Very powerful and can be used for rough works,
- The blades are changeable, so can be used for delicate work also,
- The speed and depth temperamental as well.
To cut using a power jigsaw, you need to place the piece of wood you will be working on horizontally. There is a base plate on the bottom of the jigsaw that will hold the tool in place while you cut. To safely operate the jigsaw always make sure the baseplate is horizontal with the surface of the wood. Never hold down the piece of wood you are about to cut using your hand. Use clamps to hold the wood in place. If you are using clamps to hold the wood in place, always make sure they are out of your way and will not obstruct you when you cut.
Safety
Jigsaws are comparatively safer than other power tools. Even if your fingers are exposed to the blade while it is on, due to the thin blade, it is impossible to sustain significant injuries. Nevertheless, it is a good idea to wear gloves when operating a power jigsaw, or a scroll saw.
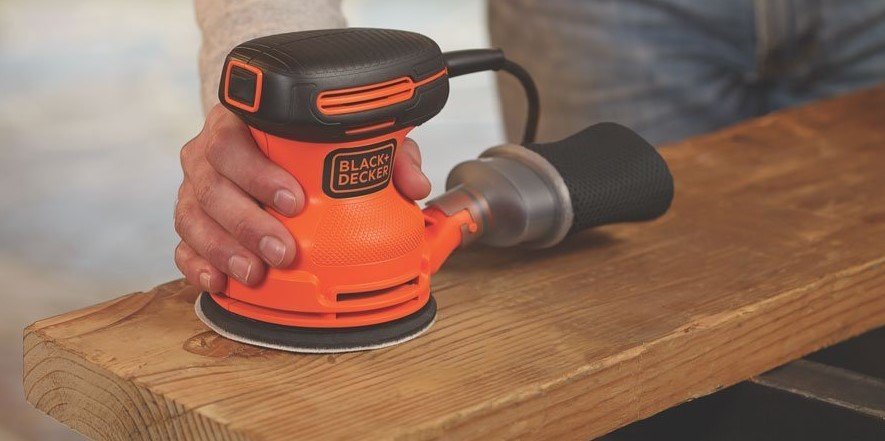
4. Random Orbital Sander
Random orbital sanders are handheld power tools that have a sanding paper attached to it. The motion of the sander is orbital but does not completely complete circles; instead, the movement is random. This random motion ensures the finishing is just perfect, and a circular pattern is not left behind after the sanding is complete.
A random orbital sander competes with a belt sander in speed and power but also provides a more exceptional finish than a standard orbital sander. Random orbital sanders have three versions. They are electric powered, air powered, and orbital floor sanders. The electric powered and air powered are handheld random orbital sanders. While the orbital floor sander is a large machine that needs a solid surface to rest on but covers a lot more ground and works faster. In addition, different qualities of sandpaper can be attached to the body to fit the task you will be performing.
The disks move in a random motion and spin simultaneously. This ensures that a pattern is not produced after the work is done and also makes sure the sander is not sensitive to the direction the wood grains are facing. So even if two pieces of woods are joined together, the sander can produce a finishing that will make it impossible to tell the two pieces of wood apart. Many random orbital sanders have dust collectors built in them that will ensure that your surrounding is not filled with dust after you are done working.
Pros:
- Does not leave patterns after finishing,
- Easy to change sanding papers,
- Dust collector ensures your surrounding remains clean.
When using a sander, make sure you place it onto the wood before turning it on. The motion is steady and can put you off, so grip the body with both hands. Move the sander a foot every ten seconds to make sure the exposure to the wood is even. You can use pencil marks or calks to make sure you cover the surface of the wood you are working on evenly. Do not apply too much pressure on the sander. Just let the weight of the sander do the job. Make sure you do not tip the sander over the edge to avoid damaging the woodwork.
The fine dust produced is harmful to health. So always remember to wear a mask while using the tool. Also, use eye goggles and a noise canceling headphone. The dust is also harmful to your lungs as well as your eyes. Using a noise canceling headphone will ensure your ears are safe from the loud sound produced while using the instrument.
5. Table Saw
A table saw is a power tool consisting of a table and a circular saw blade. The circular saw blade protrudes through the surface of the table, and the table acts as a support for the material that you want to cut. An electric motor usually runs the saw blade. Modern table saws have a variable blade depth. The depth is generally changed by moving the blade up and down. In the older version, the table is moved up and down to expose or cover the blade. Table saws can be bought and also be made if you have a table and a circular saw in possession.
The first table saw model was patented by an English man in the 18th century.
There are eight versions of the table saw. They are compact, benchtop, job site, contractor, hybrid, cabinet, and sliding. Compact table saws are the standard table saws with a larger blade than a circular saw blade. The benchtop table saw is semi-portable and can be put on tables where you want to operate it. It is easier to move than a standard table saw. The job site table saw is slightly bigger than the benchtop table saw. It has foldable legs and can be set up at the job sites.
Contractor table saws are an older model with a very more significant table saw where the base is attached to wheels so that the tool can be moved. Cabinet table saws are even more significant and are heavy. Its mass allows it to be almost vibration free, which significantly increases precision and accuracy. Hybrid table saws are a mic of both contractor and cabinet table saws. They are also lower in price than both its original versions. Sliding table saws are the giant version of all the table saws where the table can be slid open to increase its surface area.
Pros:
- Can be used for multiple woodworking purposes,
- Very powerful, can easily cut a lot of woods in a short period,
- Lots of options to choose from
Safety
Table saws are a bit more unsafe than the rest of the tools on this list. This is mainly because the user holds the material being cut instead of the blade or tool itself. This makes it easy to move your hands in the path of the blade accidentally. In recent years, a new feature is added to newer versions of the table saw that causes the blade to automatically brake if the user's hand wander near the blade. This is done with the help of sensors. And of course, always wear goggles, mask, and noise-canceling headphones while operating power tools.
6. Compound Miter Saw
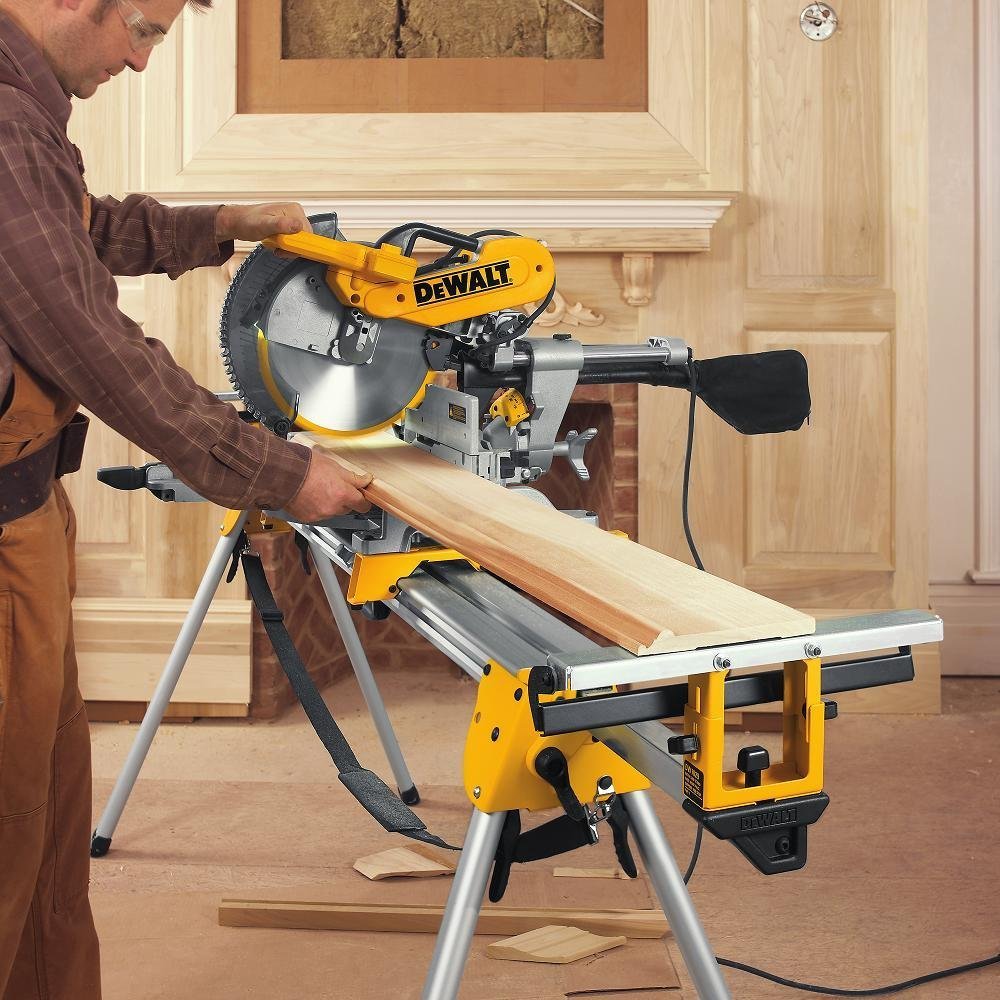
The miter saw consists of a mounted circular saw and a board with a rectangular hole in it, through which the circular saw can through to make cuts. Miter saws are used to make precise cross cuts. Miter saws are also known as drop saws because the blade falls on the material you are about to cut. This operation of the blade falling on the object you want to cut makes it very accurate.
The power miter saw was invented by a tool designer for Rockwell in 1964. However, the inventor didn't patent the invention, leading to a large number of innovations on the tool by a variety of manufacturers.
Pros:
- An extremely versatile tool,
- Have various settings and can cut from multiple angles,
- Can perform many types of cuts.
While regular miter saws can only cut in a 90-degree angle, compound miter saws are more flexible and can cut at various aspects. A compound miter saw does its function by bringing down a circular blade onto the material you want to work on.
A compound miter saw can perform four kinds of cuts. They are crosscuts, miter cuts, bevel cuts, and compound cuts. Cross cuts are basic cross section cuts. Miter cuts are similar to cross cuts except for the fact that the cut angle is not perpendicular to the length or width of the wood. Bevel cuts are straight cuts, but the cut does not go through the thickness of the wood; instead, the cut is slanted and usually at 45-degree angle. Compound cuts are the mixture of both miter cuts and bevel cuts.
The procedures about how to make these cuts are explained in details in the instruction manual that will come with the version of the compound miter saw that you buy. Different models of the compound miter saw are operated in different ways. So, make be sure to read the instruction manual to avoid damaging your work-piece or the tool itself while using it.
Safety
It is pretty safe to use a compound miter saw, because, like a circular blade, the blade on the miter saw has a blade cover as well. The part of the blade facing you will always be covered unless the blade cover is manually removed. There is almost no situation where you will need to remove the blade cover manually.
7. Wood Router
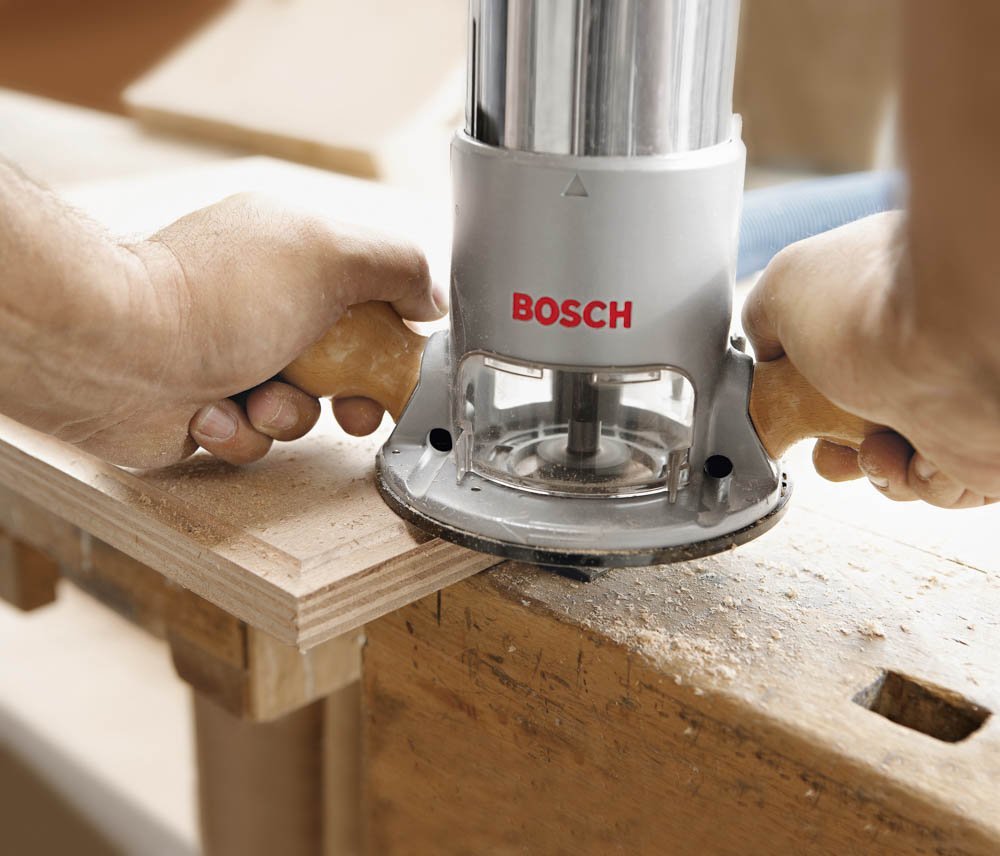
A wood router is a handheld power tool that allows you to rout pieces to wood without a lot of hassle. Routing involves drilling in a piece of woods and also making long straight or curved cuts from the initial position. The typical wood router consists of a broad base and a narrow blade that protrudes through the base plate. Other than general woodworking, it is also used for designing on woods as well.
First handheld power wood routers emerged in 1915 and were called Onsruters. The power tool version of the wood router became popular from the 1960s.
Another version of the wood router is the table mounted wood router. The table mounted wood router consists of an upside down wood router mounted on a table, and the blade sticks out upwards. This is not a handheld version. In this case, the tool remains stationary while the wood piece that is going to work on needs to be moved. It is easier to work on small pieces of wood on the table mounted wood router.
See Also : Plunge Router
Router bits (the blades/head) come in a variety of different versions. So, when it comes to designing your creativity will be the only obstacle. When fitting a router bit, always disconnect the power cord. Curving wood using a wood router is very simple. The right handle usually locates the switch that turns on the wood router. The speed adjuster is usually located at the top. The router bit depth adjustment is usually located beside the left handle. Use this to adjust how far the drill bit goes into the wood.
After pushing the router as far as you want it, flick the lever to hold the router at that fixed dept. Keep in mind that different version has switches located at different places. Always fix the piece of wood you will be working on using clamps or other similar benchtop accessories. If not fixed in place, the wood will likely slip, and your work will be damaged. Due to the direction of the rotation of the drill bit, you start working on the wood from the right and move to the left. Also, make sure the surface of the wood you will be working on is understandable, and there are to peaks.
Safety
It is almost impossible to injure yourself using a wood router unless you mistakenly drop it on your foot. Handle it with care because the tool is quite substantial. Also, be sure to wear goggles as wood bits may come flying at your eye.
The oscillating tool is the most versatile tool on this list. It is also known as multi-tool because it can serve a wide array of function with a single body. The oscillating tools have many accessories and adjustments that allow them to do so. Some blades will serve almost all your woodworking needs available for this tool.
The oscillating tool function by the side-to-side movement. The motor causes the blades you attach to this tool to move from side to side very fast, so fast that the movement can be counted as a vibration. While cutting this movement brushes away wood particles, and so the cut is immaculate and precise. You can also cut metal and plastic with the oscillating tool.
There are individual blades for cutting metal. They are called bimetal blades. So, if you want to cut metal using the oscillating tool, in the store ask for bimetal blades. Your local hardware store may not have many options for blades and accessories for the oscillating tool. But no need to worry. There are a countless number of accessories and blades available on the internet and are very cheap as well. If those accessories are utilized correctly, this tool can perform almost all the tasks other tools mentioned here can perform.
Pros:
- Can be used for countless purposes, your creativity is your only limit,
- Lots of blades and accessories available,
- Fulfills a lot of tool’s functions,
- Compared to its usefulness, it is relatively cheap.
Other than cutting, this tool can also be used as a sander. Connect the sanding accessory, and you are good to go. The side to side movement brushes the surface of the wood and evens out the surface. There are scraper blades available as well. Using the scraper blade, you can easily remove the grout and other adhesives that would take hours to remove using a knife. You can remove the grout between tiles with the help of scraper blades and avoid damaging the tiles in the process. You can also remove a whole toilet just using the oscillating tool.
Related: Using an oscillating tool
It is also very light and slim so it can reach a lot of tight spots other tools cannot reach. A yet unpopular use of the oscillating tool is to grind. Using the grinder blade, you can grind almost anything to dust. Overall, the oscillating tool is a must-have for your toolbox. Any toolbox is merely incomplete without the oscillating tool.
A framing nailer is a nail gun used to shoot nails in wood to attach two pieces. It gets the name of framing nailer because it is mostly used to nail frames. The nail is usually pushed out the gun at high speed using compressed air, electromagnet or highly flammable gases. In the case of the highly combustible gases, the gases are exploded in a controlled manner, and the energy produced is used to shoot the nail out of the gun at a very high speed. The electric nail gun uses a motor to compress a spring; then the trigger releases the spring, which pushes the nail out at high speed.
In recent days, nail guns have primarily replaced hammers and are the first choice for many woodworkers.
The first of nail guns were invented in the 1950s, and those used compressed air to shoot nails. The first framing nailers was invented by a civil engineer to speed up construction. The first nail gun could hold 500 nails and shoot about 50 nails per minute. The operator had to stand still to use it. Framing nailers have evolved a lot since then.
Pros:
- Makes nailing a whole lot easier,
- Can hold a lot of nails,
- Very straight forward to use.
Most framing nailers that use compressed air need a separate air compressor to work. At first, this may seem like a hassle, but a separate air compressor makes the gun super light and easy to use. If you are nailing frames together, always glue the pieces together first. This will make sure the finishing of the product is better. Without the glue, the first nail you attach will act as a pivot, and the woods will be free to be displaced. While holding down the wood, make sure the nail gun does not slip off the edge will you fire. This may lead to severe injuries.
Safety
A framing nailer requires a lot of caution during usage. For necessary protection, use eye goggles and wear noise-canceling earphones. Especially if you are using an air compressor, it can get deafening. Some framing nailers can be considered as a firearm, so similar caution should be used while handling those nailers. Most nailers have a push-down trigger in the nozzle so those cannot be fired unless they are held down against a solid surface. If you are looking to buy a framing nailer for basic woodworking needs, you will be better off purchasing the pushdown versions.
10. Staple Gun
A staple gun, also known as powered stapler, is a handheld tool that can be used to drive metal staples into paper, wood, plastic, masonry and other materials of similar sorts. The stapler gun has many uses; it can be used for any operation that requires you to affix two pieces of material together. It can be used for insulation, roof set, wiring, upholstery, carpeting, woodworking, and much more.
The staple gun is a primary power tool, and the history behind its first inception is a bit blurred.
Pros:
- More convenient than regular staplers,
- Saves a lot of time and effort,
- Can staple on wood, plastic and even metal as well.
There are different versions of the staple gun that uses different techniques to fire the staples. The compressed air version uses highly compressed air with a lot of pressure to drive the staple in the material. The electric version uses a motor to compress a spring which is suddenly released to force the staple out in high speed. Some powered staplers have long extended nose so enable them to function in light spots and reach in restricted areas.
To use a staple gun, you have first to load the gun. To load the gun, remove the track that is located at the back of the gun. After removing the track, a slot will be revealed where you will load the staples. Although some versions may have different procedures for loading a staple gun, so it is safe to refer to the usage guide that comes with the tool. Always center the nose of the gun on the place you want to staple, or you might misfire.
Also, remember the gun is not meant to be placed flat on the surface you intend to staple. You need to raise the back portion of the gun and keep only the nozzle (through which the staple will come out) on the surface. Also, remember to hold the gun with both hands because it might have a recoil which will cause the gun to slip.
Safety
The stapler gun also requires a lot of caution to use. If will not be able to cause severe injuries like the nail gun but still it will be able to cause a considerable amount of pain. Some stapler guns also have the push-down nozzle feature, which makes the tool substantially safer to use. Other than that, always wear eye protection (goggles). The noise produced by firing the staples is insignificant, but still, it is safer to use noise-canceling headphones while using the staple gun.
Related: Non-Power Tools for Survival
Video: Hand and Power Tool Safety Training
Other DIY Tools.
Pry Bar for Pallets, Removing Tiles, Flooring, Roofing, Deck Boards and Trim.
Heat Guns for stripping wallpapers, paint, tinting windows, or even drying objects.
Conclusion
Contrary to popular belief, woodworking is very easy. With the help of the tools we have listed here, you will never have to hire a professional ever again. And once you start doing these minor works by yourself, you will begin to enjoy them. Overall, about how useful power tools are, I still cannot stress enough how important it is to be cautious during their usage. Always make sure your surrounding is free from distraction while you use them.
Also, before purchasing a power tool, remember to check if safety associations like CSA and NSC certify them. Check if the devices come with a usage guide (they most likely do).
Make sure you read the usage guide before using a power tool. Even if the device is safe to use, reading the user guide will ensure you do not damage the tool itself while operating it. While cleaning the tools, remember to unplug the power cords. Your safety should be a priority. If you damage the tools, you can always buy another one, so keep your safety above the safety of the equipment.




Wow, I’ve enjoyed the view of these tools and it has boosted my desire to open up my own workshop. But the issue is how to get those tools I believe in my country they are not available , so if you could best advise on that I’ll would appreciate.
Wow, I’ve enjoyed the view of these tools and it has boosted my desire to open up my own workshop. But the issue is how to get those tools I believe in my country they are not available, so if you could best advise on that I’ll appreciate it. Thank you for the great post information.
I have learned too much from your blog and I like a Jigsaw tool is best for me.